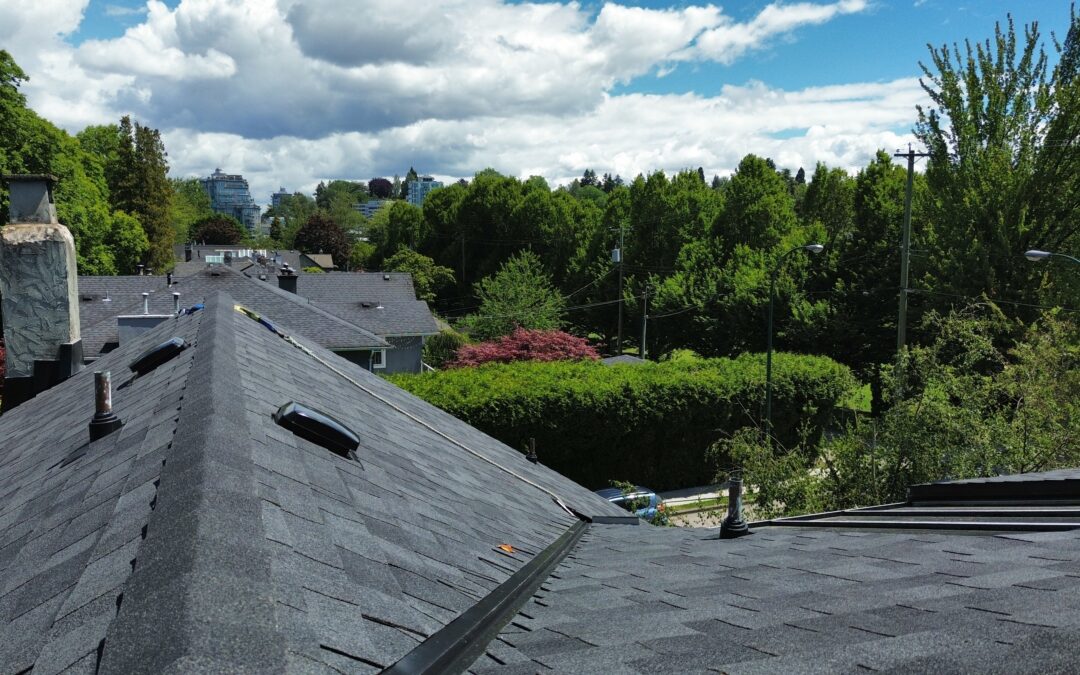
Shingle roofing is one of the most popular roofing choices in Vancouver, and it’s easy to see why. Not only is it durable, but it also offers a clean, classic look that fits perfectly with Canadian homes. Did you know that in Canada, 39.4 million metric bundles of asphalt shingles are manufactured each year? That’s how much homeowners trust this material to protect their homes.
But here’s the thing—having the right tools for the job can make all the difference. The right equipment not only ensures that your shingle roofing project is done correctly but also makes the process safer and faster. Whether you’re planning a DIY project or working with professional shingle roofers near you, understanding these tools is a game changer.
In this blog, we’ll dive into the seven essential tools you need for shingle roofing. From measuring to safety gear, we’ve got you covered. Let’s get started!
1. Measuring Tools for Shingle Roofing Precision
When it comes to shingle roofing, precision is everything. A slight mistake in measurement can lead to uneven shingles, gaps, or even wasted materials. That’s why having the right measuring tools is essential for a smooth and efficient installation process.
Tools like tape measures and chalk lines are staples in any roofer’s toolbox. Tape measures help you get the exact dimensions of the roof, while chalk lines make it easy to mark straight, accurate lines for placing your shingles. For added accuracy, a level ensures that your shingles are aligned properly, giving your roof a clean, professional finish.
Whether you’re working on your own roof or relying on experienced shingle roofers near you, these tools ensure every cut and placement is spot on. Remember, a precise start sets the foundation for a durable and beautiful shingle roof.
2. Cutting Tools for Asphalt Shingles
Cutting asphalt shingles to fit around edges, vents, or chimneys is a crucial part of any shingle roofing project. For this, having the right cutting tools is non-negotiable. These tools help ensure clean, precise cuts, making your roof look seamless while maintaining its durability.
One of the most commonly used tools is a utility knife with a sharp blade. It’s perfect for trimming shingles to the exact size you need. Shingle shears or roofing snips are also great options, especially for thicker materials that are harder to cut with a knife. Both tools make it easy to shape shingles without cracking or damaging them.
The right cutting tools not only save time but also reduce material waste. For those working with professional shingle roofers near you, these tools are a standard part of their equipment, ensuring your roof is both functional and aesthetically pleasing.
Accurate cuts are what turn a good roofing job into a great one, so don’t underestimate the importance of having the proper cutting tools on hand!
3. Roofing Nail Guns for Fast Installation
Installing shingles quickly and securely is key to completing a shingle roofing project efficiently, especially in places like Vancouver where unpredictable weather can cut timelines short. That’s where roofing nail guns come in—they’re a game-changer for speed and precision.
Roofing nail guns are designed to drive nails into shingles with consistent depth and force. Unlike a hammer, which requires more effort and time, a nail gun ensures every nail is firmly placed without overdriving or damaging the shingle. This is especially important for maintaining the integrity of the roof material and ensuring the shingles stay in place during strong winds or heavy rain.
Many professional shingle roofers rely on nail guns for fast and reliable installation, making them a must-have tool for large-scale projects. If you’re considering a DIY approach, it’s worth investing in or renting one for a more professional result.
With a roofing nail gun in hand, you’ll not only save time but also achieve a cleaner, more durable finish for your shingle roofing project.
4. Safety Gear for Roofing Projects
Roofing projects, especially those involving shingle roofing, can be dangerous without the right safety gear. Whether you’re a homeowner tackling a DIY job or working with professional shingle roofers near you, safety should always come first.
A high-quality harness is essential for preventing falls, particularly when working on steep slopes. Combine this with a sturdy helmet to protect your head from unexpected accidents, like falling tools or loose shingles. Non-slip boots are another must-have, providing better grip and stability as you move across the roof.
Don’t forget gloves—they protect your hands from sharp edges on shingles and other roofing materials. For those working in Vancouver’s wet or cold weather, insulated gloves are a smart choice to keep your hands warm while maintaining a secure grip.
Investing in proper safety gear not only protects you but also makes the job smoother and more efficient. A safe roofer is a successful roofer, so gear up before you climb up!
5. Roofing Hammers for Manual Work
While nail guns are great for speed, roofing hammers remain essential for certain tasks in shingle roofing projects. These versatile tools give you precision and control, especially when you need to secure nails in hard-to-reach areas or make minor adjustments during installation.
Roofing hammers are designed specifically for roofing jobs, with a flat side for driving nails and a claw for removing them. This makes them ideal for quick fixes or replacing individual shingles. They’re also lightweight, allowing roofers to work comfortably for extended periods.
Professional shingle roofers often carry roofing hammers as a backup tool, ensuring they’re prepared for any situation. For DIY enthusiasts, a good roofing hammer is a reliable companion when working on smaller repairs or detailed tasks.
Whether it’s for driving nails or making adjustments, a roofing hammer gives you the flexibility to handle the finer details of your shingle roofing project with ease.
6. Roofing Shovels for Removing Old Shingles
Before you can install new shingles, the old ones often need to be removed—and that’s where roofing shovels come in. These specialized tools make the tough job of tearing off worn-out shingles quicker and easier, saving you time and effort.
Roofing shovels are designed with flat, serrated edges that slide under shingles to pry them up, along with the nails holding them in place. Unlike a standard shovel, their design helps prevent damage to the underlying roof material, ensuring the surface is ready for the new layer of shingles.
This tool is especially helpful when tackling larger areas, as it allows for efficient removal without requiring too much physical strain. Professional shingle roofers rely on roofing shovels to prepare the roof quickly and thoroughly before starting the installation.
If you’re planning to DIY your shingle roofing project, investing in a quality roofing shovel can make this prep work much less daunting, leaving you with a clean slate to work on.

7. Roofing Adhesives and Sealants for Durability
When it comes to shingle roofing, adhesives and sealants are the unsung heroes that keep everything in place and protected. They provide an extra layer of security, ensuring your shingles stay put even in Vancouver’s rainy and windy weather.
Roofing adhesives are used to bond shingles together, preventing them from lifting during storms. Sealants, on the other hand, are perfect for sealing gaps and cracks around vents, chimneys, and edges to keep water from seeping in. Together, they play a critical role in extending the life of your shingle roof and preventing costly repairs.
For DIY projects, using the right adhesive or sealant is essential for a long-lasting result. Professional shingle roofers are experts in selecting the best products for different roofing materials and weather conditions, ensuring maximum durability and protection.
Whether you’re reinforcing shingles or sealing vulnerable areas, these products add the finishing touches that make your shingle roofing project a success. After all, a durable roof is the best defense against the elements!
CONCLUSION:
Having the right tools is essential for any successful shingle roofing project. From precise measuring tools to durable adhesives and sealants, each piece of equipment plays a crucial role in creating a sturdy and long-lasting roof. These tools not only make the job easier but also ensure your shingle roof looks great and holds up against the elements.
If you’re tackling a roofing project yourself, investing in the proper tools can save you time and frustration. And if you ever spot damaged shingles, knowing what steps to take is just as important. Check out these 5 essential steps for shingle roofing when you see broken shingles to learn how to address the issue effectively.
A well-prepared roofing project starts with having the right gear and ends with a roof you can trust. Ready to start your next shingle roofing project? Let these tools guide you to a smooth and successful result!

